WeighMyBru Assembly Guide
Ready to build your WeighMyBru smart coffee scale? This comprehensive assembly guide will walk you through every step of the process, from unpacking your components to your first brew.
Assembly Video Tutorial
Follow along with our detailed assembly video guide:
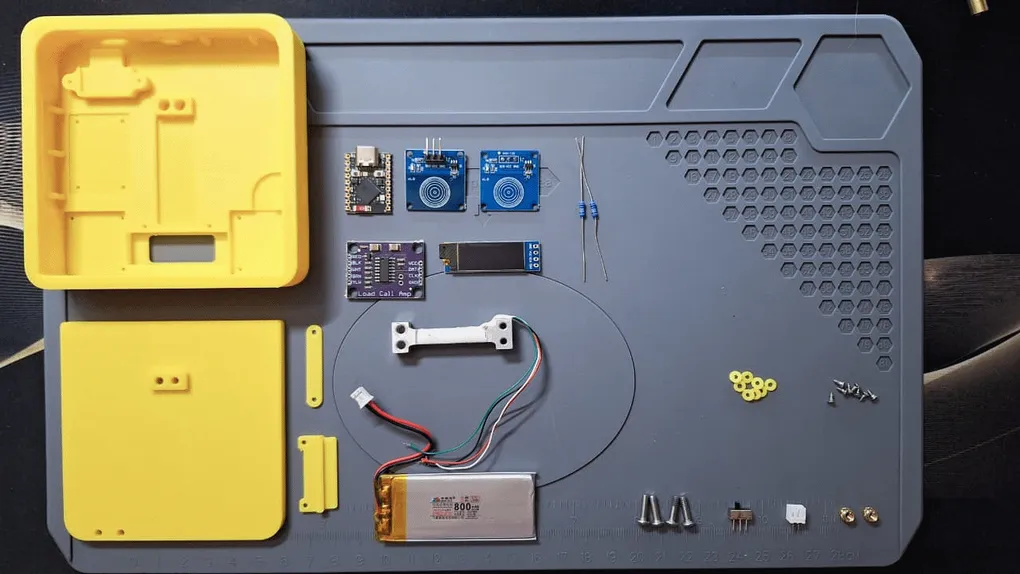
Bill Of Materials
⚠️ Warning ⚠️
There is a known issue with certain ESP32-S3 Supermini board where they are NOT discoverable using GaggiMate. The recommended board is the Seeed Studio XIAO ESP32S3 listed in the BOM below.
NOTE
Ensure the correct items are selected when purchasing. Some of the links have multiple options. It is always a good idea to purchase extra boards for items like HX711 or Capacitive Touch Pads, as sometimes depinning these can destroy the boards traces.
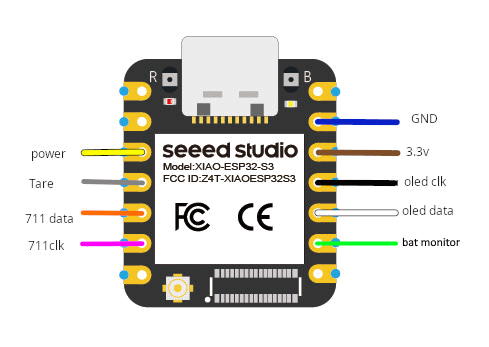
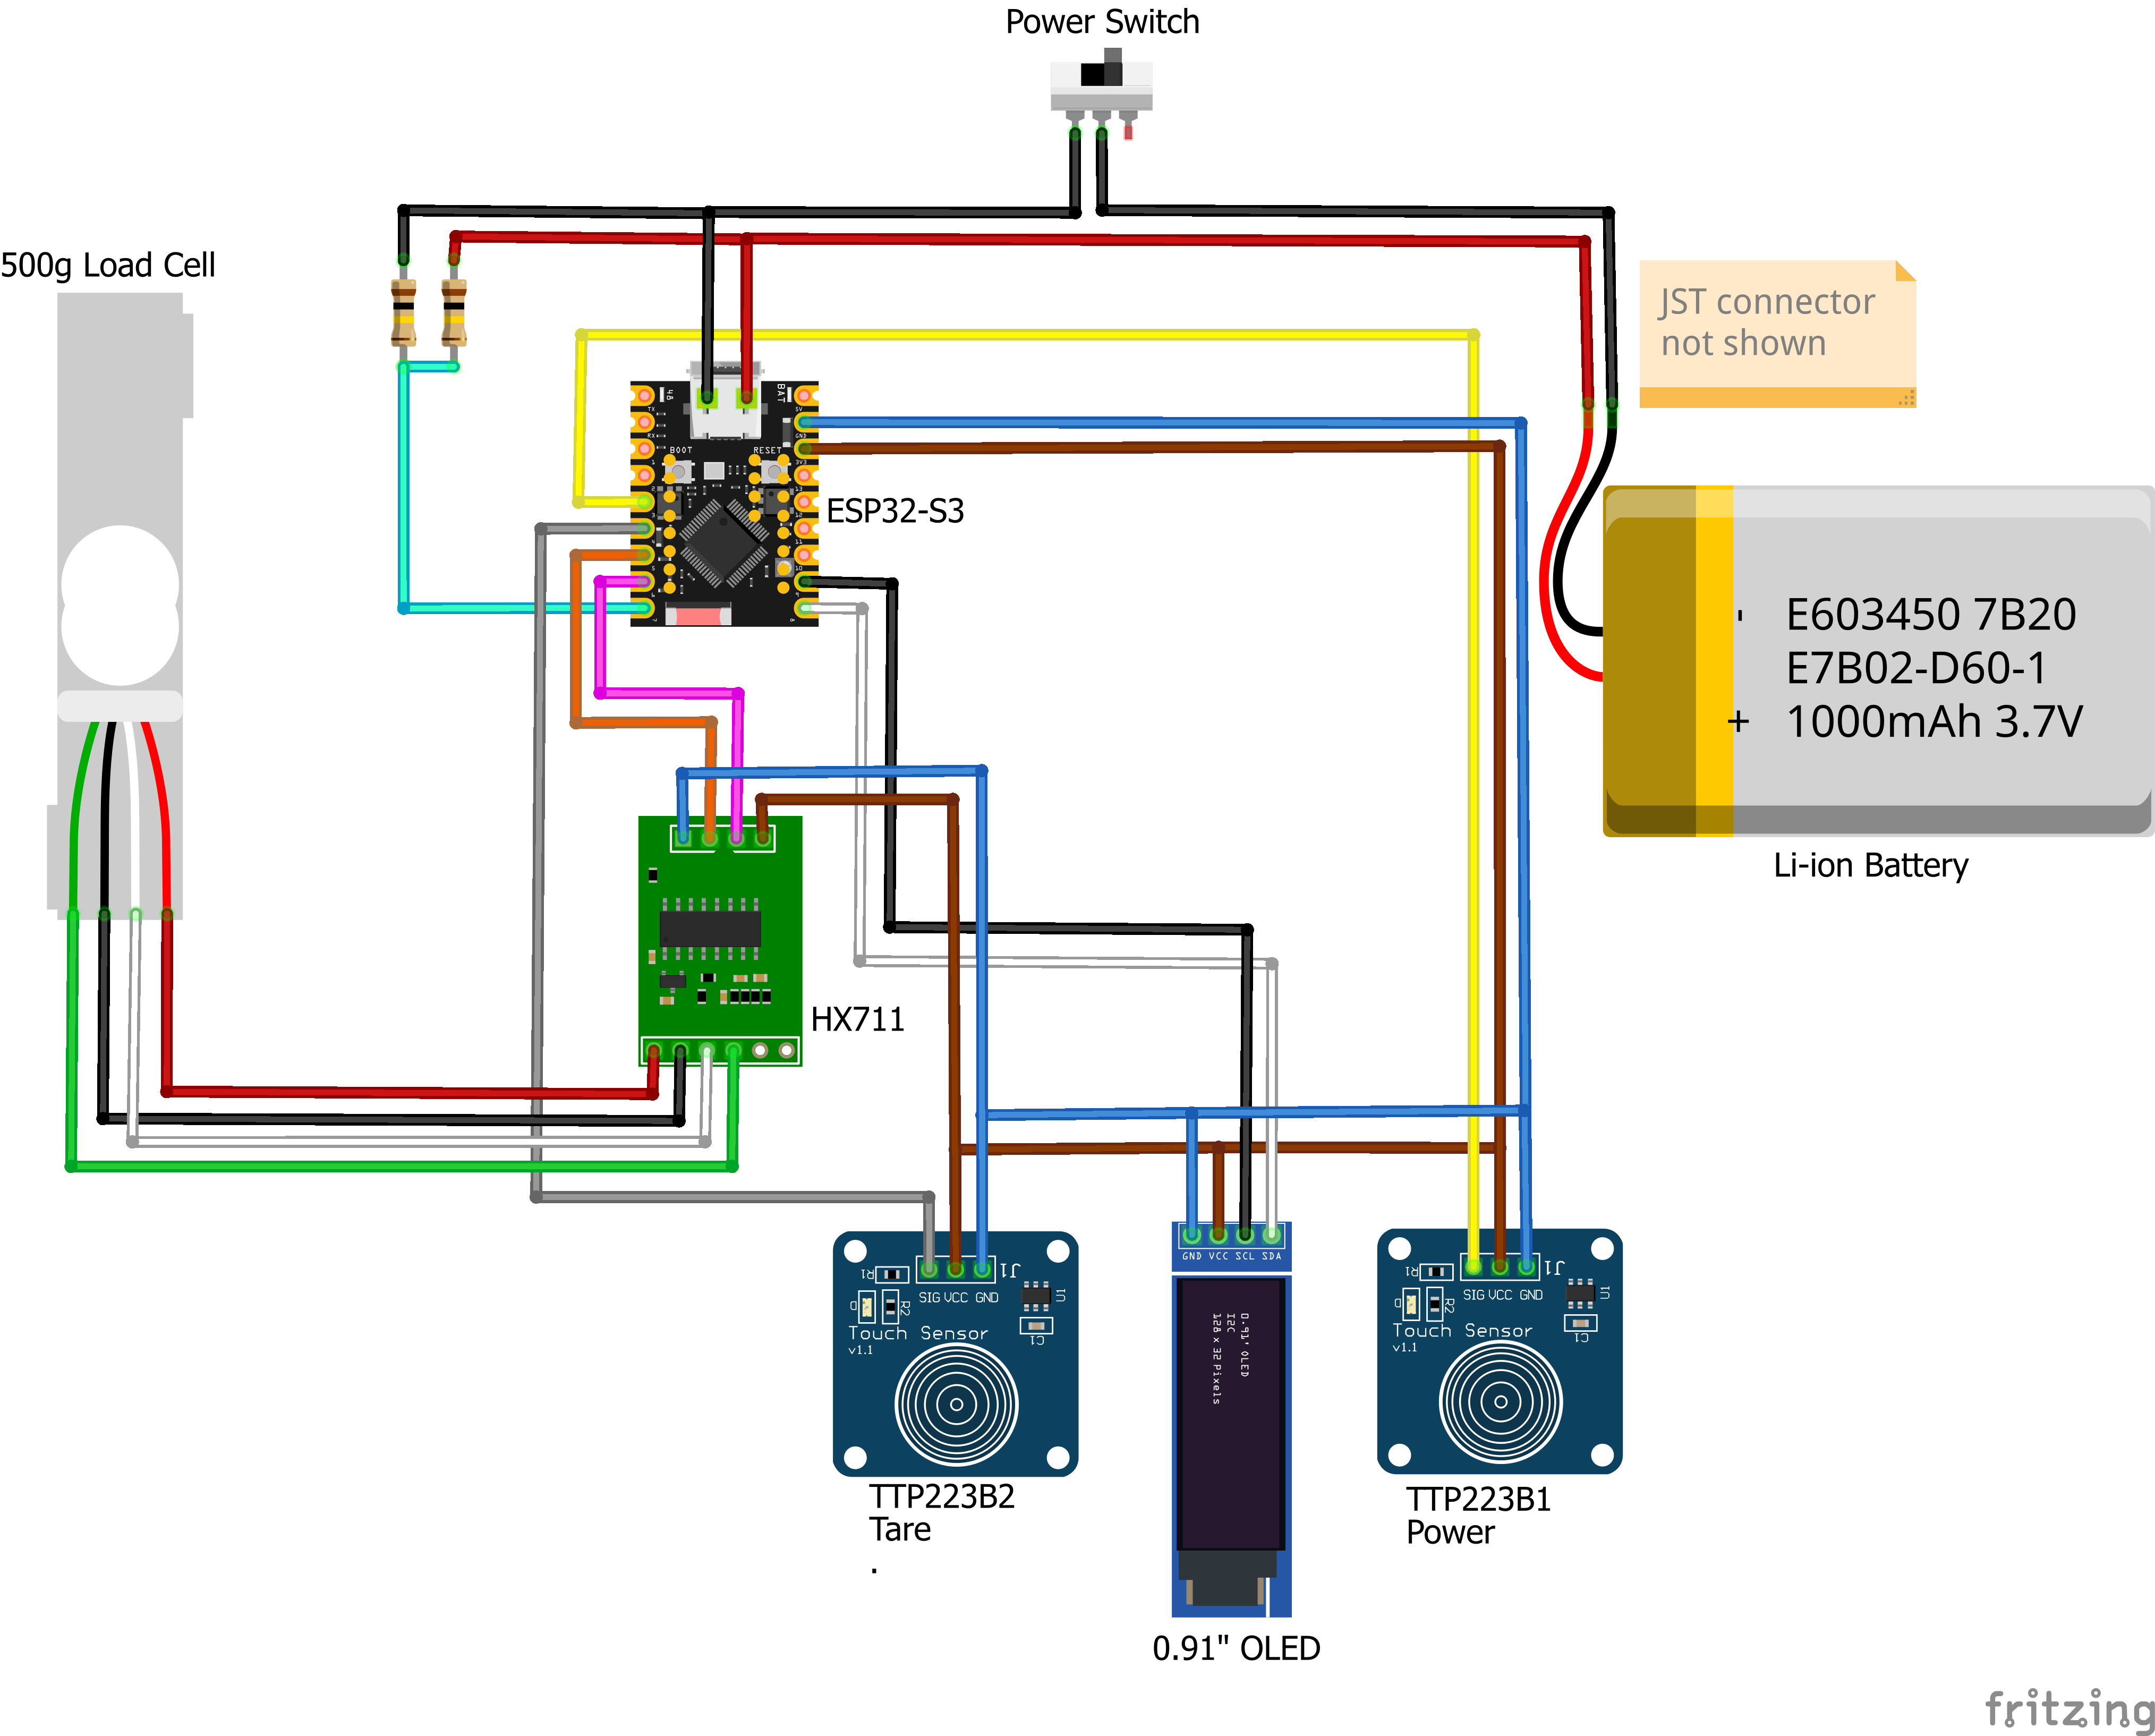
Wiring Diagram
Seeed Studio XIAO ESP32S3
ESP32 Supermini
Assembly Steps Overview
1. PCB Preparation
- Install ESP32 headers
- Mount load cell amplifier
- Check all connections
2. Load Cell Mounting
- Secure load cell to base plate
- Connect load cell wires to PCB
- Test weight measurements
3. Enclosure Assembly
- Install PCB in bottom case
- Route cables properly
- Secure top and bottom halves
4. Calibration
- Power on the scale
- Connect to WeighMyBru app
- Run calibration sequence
Troubleshooting
Scale not powering on?
- Check battery connections
- Verify power switch position
- Test with USB power
Weight readings incorrect?
- Recalibrate with known weights
- Check load cell connections
- Verify mounting is secure
Bluetooth not connecting?
- Reset ESP32
- Check app permissions
- Verify pairing mode
Next Steps
Once assembled:
- 📱 Download compatible brewing apps (Bean Conqueror, GaggiMate)
- ⚖️ Calibrate with precision weights
- ☕ Start brewing amazing coffee!
Need Help?
Join our community Discord for assembly help and brewing tips: WeighMyBru Discord
Happy brewing! ☕